Mould in walls usually starts months before you can see it, feeding on moisture trapped inside the wall cavity where no cleaner can reach.
Many homeowners across Newcastle, the Central Coast and the Hunter Valley notice a patch of discolouration or a musty smell, wipe it down, and assume the problem is handled. The patch almost always returns, because the colony was never on the surface in the first place.
This guide explains how mould in walls actually grows, why surface cleaning cannot reach it, and what a proper fix involves.
Already seeing stains or smelling mould coming from a wall? Book a professional mould inspection or view our mould removal service and a qualified technician will locate the source before any treatment begins.
How Mould in Walls Actually Grows
Mould needs three things to grow: moisture, a food source, and a stable temperature. A standard plasterboard wall provides all three in abundance. The paper facing on plasterboard is almost pure cellulose, which is one of the most preferred food sources for common household mould species according to the Better Health Channel.
The moisture comes from somewhere the homeowner rarely sees. A slow leak behind a shower recess, condensation forming on the cool side of an external wall, a blocked weep hole letting water sit in the cavity, or rising damp wicking up through the bottom plate. Any of these can feed a colony for months before a single spot appears on the visible side of the plasterboard.
Condensation is the most common moisture source in Australian coastal homes. When warm, humid air meets a cooler wall surface, water droplets form on or inside the wall. External walls, corners and walls behind large furniture are worst affected because airflow is restricted and the temperature difference between inside and outside is greatest. In areas like Newcastle, the Central Coast and Lake Macquarie, average relative humidity sits above 60 per cent for much of the year, which means condensation risk is high even in well-maintained homes.
- Cellulose in plasterboard paper is a preferred food source for mould species including Stachybotrys, Aspergillus and Cladosporium
- Timber framing behind the plasterboard offers a secondary food source once the colony spreads
- Wall cavities tend to hold a steady 18 to 26 degrees year-round, which the Better Health Channel identifies as the optimum temperature range for mould growth
- Moisture often stays trapped in the cavity long after the original leak has dried on the outside
By the time a stain appears on the visible face of the wall, the colony has usually been established in the cavity for between three and twelve months. The visible patch is a late symptom, not an early warning.
What Causes Mould on Walls
Every mould colony traces back to a moisture source. The type of moisture determines where the colony forms, how fast it grows, and how difficult it is to fix. In most Australian homes, one of four mechanisms is responsible.
Condensation
Condensation is the single most common cause of mould on walls in coastal NSW. When warm, moisture-laden air meets a wall surface that sits below the dew point, water forms directly on or inside the wall. This happens most often on external walls, in corners, and behind furniture that blocks airflow.
Properties across Newcastle and the surrounding suburbs are particularly affected because average relative humidity regularly exceeds 60 per cent for months at a time. Winter makes the problem worse. Indoor heating raises the air temperature while external walls stay cold, and the greater the temperature difference, the more moisture condenses on and inside the wall.
Cold Bridging
Cold bridging occurs where a material with high thermal conductivity spans the wall from inside to outside. Steel lintels above windows, concrete slab edges, and uninsulated wall ties all create localised cold spots on the internal wall surface. These cold spots attract condensation even when the rest of the wall stays dry, producing the isolated mould patches homeowners often find around window frames and at wall-ceiling junctions.
Cold bridging is one of the harder causes to identify without equipment, because the cold spot is invisible to the eye. Thermal imaging picks it up immediately.
Penetrating Damp
Penetrating damp is water entering the wall from outside. Cracked render, failed pointing, damaged flashing, blocked gutters, or a leaking roof all allow rainwater into the wall structure. Unlike condensation, penetrating damp tends to worsen during and after heavy rain rather than in cold weather.
In the Hunter Valley and across the Central Coast, where storm seasons can be intense, a single blocked downpipe can saturate a wall cavity within a few rainfall events. The mould follows the water path, so the stain pattern on the wall often maps directly to the entry point above.
Rising Damp
Rising damp draws ground moisture up through masonry by capillary action. It typically affects the lower 600 to 1200 millimetres of a wall and is most common in older homes without an effective damp-proof course. The mould pattern is distinctive: a horizontal tide line with salt deposits and crumbling plaster below it.
Key point: identifying which moisture source is driving the colony is the first step in any lasting fix. A professional mould assessment uses thermal imaging and moisture mapping to pinpoint the source before treatment begins.
Signs You Have Mould in Your Walls
Most homeowners find mould in walls one of two ways. They see the stain on the paint, or they smell it before they see it. There are also quieter signs that often get overlooked.
Visible signs
- A dark or grey patch, often irregular in shape, that keeps returning after you wipe it down
- Bubbling, peeling or soft-feeling paint, especially in a localised patch
- Small spots of black or grey speckling around skirtings, cornices or power point cutouts
- Yellow or brown staining, which usually indicates water damage that has fed a mould colony
Smell-based signs
- A persistent musty or damp smell that is strongest close to one wall
- The smell getting worse when the heating or air conditioning is running, which pushes air through the cavity
- The smell being present even when the room has been cleaned and aired out
Health-related signs
People in the home may notice increased congestion, throat irritation or worsened asthma symptoms linked to black mould exposure when they spend time in affected rooms. NSW Health notes that damp and prolonged mould exposure can trigger respiratory issues in sensitive individuals. These signs are not diagnostic on their own, but when they appear alongside stains or smells, they point strongly at a hidden colony.
Which Walls in Your Home Are Most at Risk
Not every wall carries the same mould risk. Four factors determine vulnerability: orientation, insulation, airflow, and proximity to water.
- External walls facing south or south-west receive the least sunlight and stay cooler for longer. They are the most common site for condensation-driven mould in Australian homes.
- Bathroom and ensuite walls are exposed to high humidity from showers, baths and poor exhaust ventilation. Mould often establishes behind tiles and inside the stud cavity before any surface sign appears.
- Walls behind wardrobes, beds and large furniture lose airflow entirely. Moisture cannot evaporate, and the still air behind the furniture creates ideal conditions for growth.
- Walls adjacent to plumbing risers or wet areas are at risk from slow leaks that may not produce any visible water on the wall face. Mould forms inside the cavity long before any stain shows on the paint.
If mould appears on one wall but not others, the cause is almost always specific to that wall, whether that is a concealed leak, a cold bridge, or a blocked weep hole. A targeted inspection identifies the mechanism so the treatment matches the cause.
Why Cleaning the Wall Surface Does Not Work
The reason DIY treatments like vinegar and bleach fail on mould in walls is simple. The cleaner never reaches the colony. Everything a homeowner applies to the painted surface sits on the painted surface.
- Bleach removes pigment, not roots. Chlorine molecules are too large to penetrate the paint layer, let alone the plasterboard beneath. The dark colour lifts within minutes, which looks like success. Regrowth typically occurs within two to six weeks because the hyphae (root network) inside the cavity are unaffected.
- Vinegar and tea tree oil only treat what they contact. These products work on surface mould in contained spaces like a shower grout line. They cannot cross a painted plasterboard wall to reach a colony growing in the cavity.
- Mould-resistant paints slow regrowth on clean surfaces. They do nothing to kill an existing colony. Painting them over active mould simply delays the visible stain by a few extra weeks.
- Scrubbing releases spores into the rest of the home. Disturbing mould without proper containment is how a single affected room turns into a whole-house problem.
Rule of thumb: if a stain keeps returning after every clean in the same place on a wall, the colony is inside the cavity. No amount of surface cleaning will fix it.
DIY Approaches Compared to Professional Remediation
It helps to see the options side by side. Every DIY option treats a symptom. Professional remediation is the only approach that treats the cause.
| Approach | What it treats | What it misses | Typical timeframe until regrowth |
|---|---|---|---|
| Bleach on the surface | Surface pigment | The colony in the cavity, the moisture source | 2 to 6 weeks |
| Vinegar or tea tree oil | Small surface patches | Anything behind the paint | 3 to 8 weeks |
| Painting over the stain | The stain, briefly | The colony, the moisture source | 3 to 8 weeks |
| Mould-resistant paint over untreated mould | Slows visible regrowth | The active colony underneath | 3 to 9 months |
| Professional remediation plus moisture source fix | Colony, substrate, moisture source | Nothing if done properly | 12 months guaranteed |
The pattern is consistent. Every DIY approach addresses the visible surface. The colony, the substrate and the humidity driving the growth are untouched, which is why the problem returns.
Why DIY Mould Removal Fails When the Problem Is Inside the Wall
Mould in walls is the worst-case DIY scenario. Every reason DIY fails in general becomes more acute when the colony is behind plasterboard.
- You cannot reach what you cannot see. Retail products work on the surface they are applied to. A colony growing in the cavity is physically inaccessible without opening the wall.
- The moisture source is almost always still active. Mould grows inside walls because water is getting in somewhere. Until the leak, condensation point or rising damp issue is identified and fixed, any treatment is temporary.
- Disturbing the wall spreads spores. Drilling, cutting or even scrubbing a wall with an active colony sends millions of spores into the rest of the home, often establishing new colonies in rooms that were previously clean.
- The substrate keeps degrading. Plasterboard softens as a colony feeds on it. A wall that could have been saved with early intervention often has to be cut out and replaced once DIY attempts have gone on for six to twelve months.
What we consistently see on inspection: homeowners across Newcastle, the Central Coast and the Hunter Valley have usually tried two or three rounds of bleach and paint before they call us. The colony has almost always spread further inside the cavity by the time we arrive, and the eventual fix is larger than it needed to be.
What Professional Mould Treatment Does Differently
Professional mould remediation for in-wall colonies is a different process to surface cleaning. The goal is to find why surface cleaning keeps failing, kill the colony at substrate level, remove spores from the air, and verify the result.
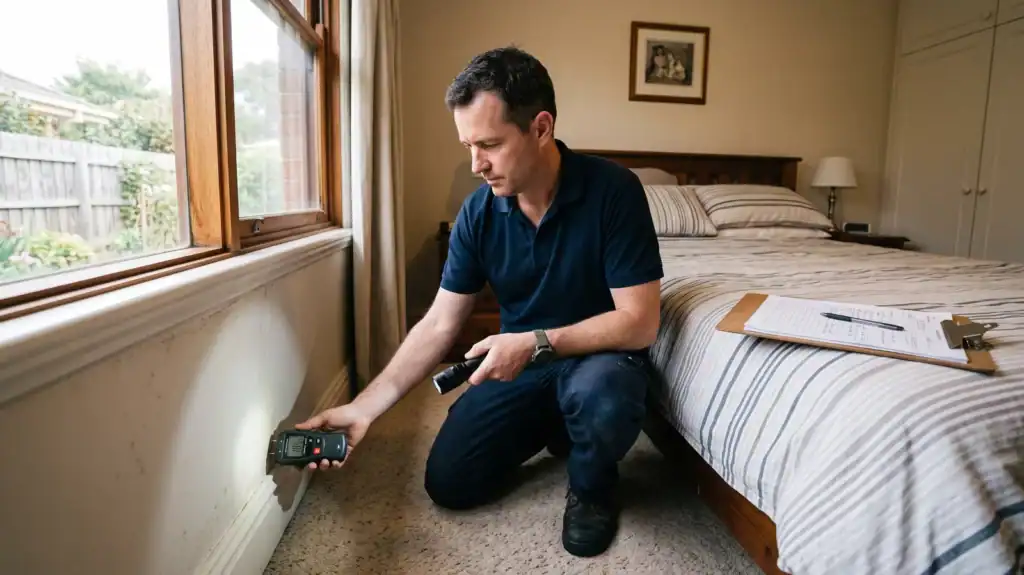
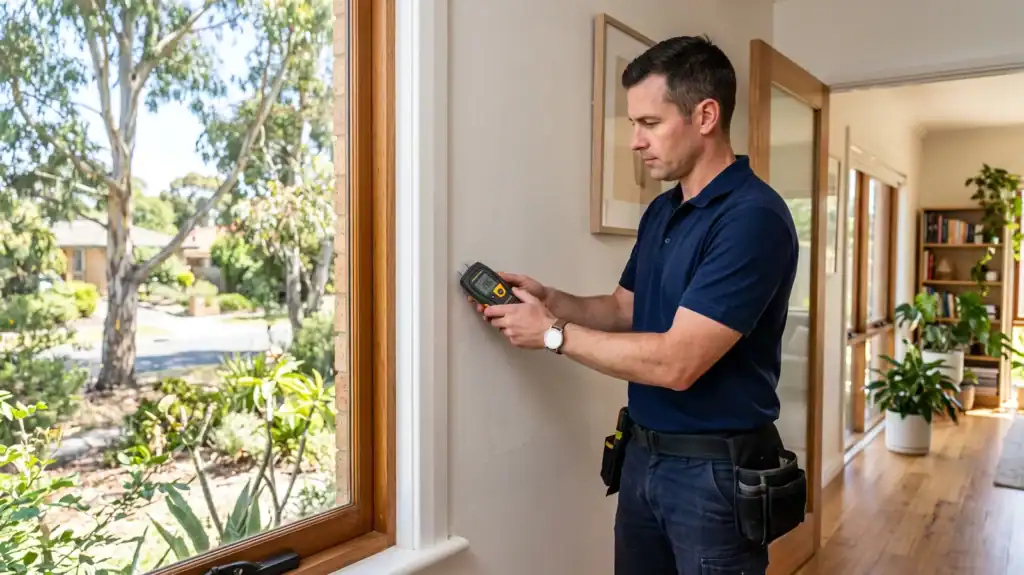
- Moisture source inspection using thermal imaging and moisture meters
- Negative-pressure containment and HEPA air scrubbing before any wall is opened
- Substrate-level antimicrobial treatment that penetrates plasterboard and timber
- Post-treatment verification and an unconditional 12-month mould-free guarantee
Moisture source inspection
The first step on site is finding what is making the wall wet. Thermal imaging, moisture meters and cavity inspection equipment identify whether the source is a leaking pipe, a waterproofing failure, a roof defect, condensation or rising damp. Any treatment that skips this step is guaranteed to fail.
Containment and spore control
Before the wall is opened or disturbed, the work area is isolated with plastic sheeting and negative-pressure containment, and HEPA-filtered air scrubbers run throughout the job. This stops spores migrating to clean rooms, which is the single biggest risk of DIY work on in-wall mould.
Substrate-penetrating antimicrobial treatment
Affected materials are treated with an Australian-made, non-hazardous, non-corrosive and environmentally friendly antimicrobial solution that penetrates into plasterboard, timber and render to kill the mould at the root. Surface cleaners cannot do this, which is why DIY approaches keep failing on in-wall colonies.
Verification and the 12-month mould-free guarantee
Post-treatment testing confirms the colony has been eliminated and the cavity is dry before the job is signed off. Every treatment is backed by an unconditional 12-month mould-free guarantee, the only one of its kind in Australia. If mould returns in that window, the treatment is redone at no cost.
Not every mould treatment provider follows this full process. If you are comparing options, understanding what to look for in a mould removal company helps you tell a thorough remediation from a surface clean marketed as one.
How to Prevent Mould on Walls
Effective mould prevention works best against surface mould risk. If a colony is already established inside a wall cavity, prevention alone will not fix it. These steps reduce the conditions that let mould take hold in the first place.
- Improve ventilation throughout the home. Open windows when cooking, showering or drying clothes indoors. Use exhaust fans in bathrooms and kitchens, and make sure they vent to outside rather than into the roof cavity.
- Keep indoor humidity below 60 per cent. A dehumidifier can reduce moisture levels in problem rooms, especially during wet seasons. The US EPA recommends maintaining indoor humidity between 30 and 50 per cent where possible.
- Move furniture away from external walls. Leave a gap of at least 50 millimetres so air can circulate behind wardrobes, beds and bookshelves. Restricted airflow traps moisture and creates the still, damp conditions mould needs.
- Fix leaks and water ingress immediately. A dripping pipe, cracked roof tile or blocked gutter can feed a wall colony for months. The sooner a leak is repaired, the less chance mould has to establish.
- Dry wet areas within 24 to 48 hours. The US EPA notes that mould can begin growing on a damp surface within 24 to 48 hours. After any flooding, burst pipe or heavy rain event, dry affected walls and cavities as quickly as possible.
Important: if you have followed these steps and mould still keeps returning, the colony is likely inside the wall cavity where prevention alone cannot reach it. A professional mould inspection is the next step.
Frequently Asked Questions
Can mould in walls make you sick?
Prolonged exposure to mould in walls can cause or worsen respiratory symptoms including coughing, wheezing and nasal congestion. NSW Health notes that people with asthma, allergies or weakened immune systems are most at risk. Hidden mould inside wall cavities is particularly concerning because spores circulate through the room without any visible warning.
What causes mould on interior walls?
The most common cause is condensation forming where warm indoor air meets a cooler wall surface. Poor ventilation, water leaks behind the wall, rising damp and high ambient humidity all contribute. In Australian coastal regions, the combination of warm temperatures and persistent humidity creates ideal conditions for mould to colonise wall cavities.
How do you know if there is mould inside your walls?
The clearest signs are a persistent musty smell near one wall, recurring dark stains that return after cleaning, and paint that bubbles, peels or feels soft to touch. If the smell gets worse when heating or cooling is running, air is likely being pushed through a contaminated cavity. A thermal imaging inspection can confirm hidden moisture and mould without opening the wall.
Can you just paint over mould on walls?
No. Painting over mould covers the stain temporarily but does nothing to kill the colony underneath. The mould continues to feed on the substrate behind the paint and breaks through again within weeks or months. Mould-resistant paints are designed for use on clean, treated surfaces, not as a treatment for active mould.
Why does mould keep coming back on my walls?
Because cleaning the surface does not reach the colony growing inside the wall cavity, and the moisture source feeding it is still active. Until both the colony and the moisture source are addressed, regrowth is inevitable. Professional remediation treats the substrate and fixes the moisture pathway, which is why it stops the cycle where DIY cleaning cannot.
Is mould on walls always black mould?
No. Mould on walls can appear black, grey, green, white or brown depending on the species. Black mould (Stachybotrys chartarum) gets the most attention, but Aspergillus, Cladosporium and Penicillium are just as common on Australian walls. Colour alone is not a reliable way to identify the species or assess the risk.
Does cold weather cause mould on walls?
Cold weather does not cause mould directly, but it creates the conditions mould needs. When heating warms the indoor air while external walls stay cold, condensation forms on and inside those walls. The colder the wall surface relative to the room, the more moisture collects. This is why mould problems across Newcastle and the Central Coast tend to worsen through winter and early spring.
Which rooms get mould on walls most often?
Bathrooms, laundries and kitchens generate the most moisture, so walls in those rooms are affected first. Bedrooms with poor ventilation are a close second, especially when wardrobes sit against external walls. Any room that stays closed for long periods with limited airflow is at elevated risk, regardless of where it sits in the house.
Can mould inside a wall spread to other rooms?
Yes. Mould produces microscopic spores that travel through the air, through gaps around power points, along shared wall cavities, and through ducted heating and cooling systems. A single colony in one wall cavity can seed new growth in adjacent rooms, which is one reason professional mould remediation includes containment and air scrubbing before any disturbed work begins.
When to Call Before the Problem Gets Worse
The right time to call a professional is the first time a mould stain returns after cleaning or painting, not the third or fourth. Early intervention usually means the plasterboard can be saved, the cavity can be dried out, and the treatment is localised to one area.
- If a stain has returned in the same spot after you have cleaned or painted over it once, the colony is in the cavity
- If a musty smell persists after the room has been cleaned and aired, there is hidden moisture somewhere
- If a wall feels soft, spongy or damp to touch, the plasterboard is likely compromised already
- If mould appears after flooding, a burst pipe or a roof leak, the cavity is almost certainly affected even if the surface looks dry
Mould and Hygiene Solutions offers professional inspections across Newcastle, the Central Coast, Lake Macquarie, Hunter Valley and Port Stephens. A qualified technician will identify the moisture source, assess the extent of any colony, and explain what a proper fix involves and what it costs before any work begins.
Found mould in a wall, or suspect a hidden colony? Book a professional mould inspection today. Servicing Newcastle, Central Coast, Lake Macquarie, Hunter Valley and Port Stephens, with a 12-month mould-free guarantee on every treatment.